How to Mount the Rails

![]()
How to Mount the Rails?
❶ Mounting Design Concept

Linear Guide Assembly Steps
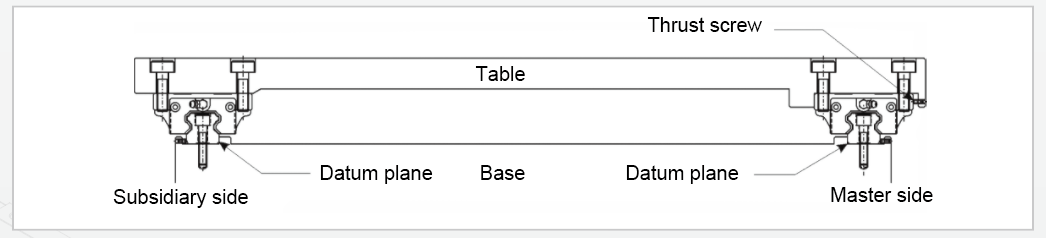
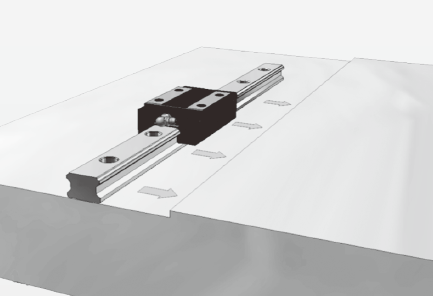
Above figure shows a typical example for rail mounting with the features below,
1. There are 2 datum planes on the base.
2. There is a crosswise datum plane aligned by a thrust screw.
3. The table thrust screw is at the master side.
❷Mounting Steps
Step1. Clean up all the burrs,
contamination objects and marks before mounting.
Note:Datum
plane is normally covered with antirust. Clean the antirust
with detergent
beforehand.
It is recommended to spray some low viscosity lubricant to protect
the datum plane.
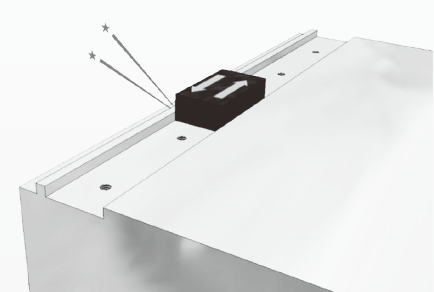
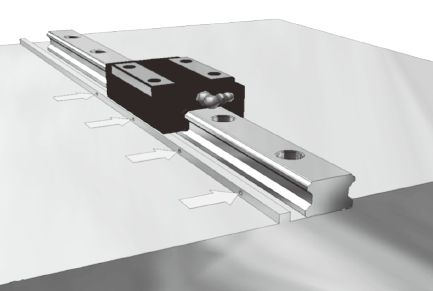
Step2. lace the rail gently on the base
and secure it with the thrust screw or other fixtures so that it contacts the datum plane nicely.Note:Check the
alignment of the screw holes before securing.
Forcing to secure the rail to unaligned screw holes will affect
the accuracy and quality due over offset.
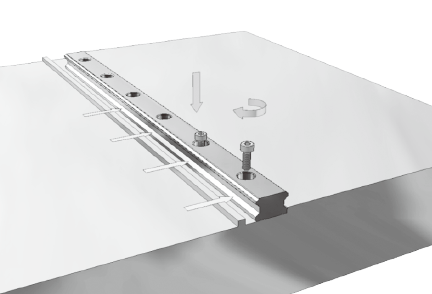
Step3. Attach the screws to screw holes
in the sequence from centre to both ends.Push the rail gently against the datum plane. Fasten the screws in the
sequence from centre to both ends slightly harder
to make the rail more stable. Push the rail harder against the datum line
to enhance the contact.
Step4. Secure the screws with a torque
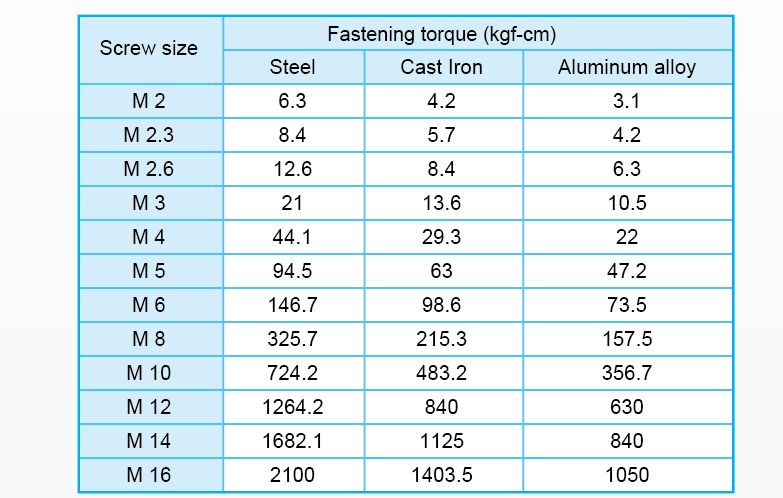
wrench with the appropriate torque selected according to based material.
Recommended rail screw fastening torque
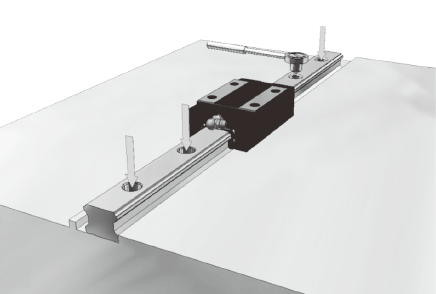
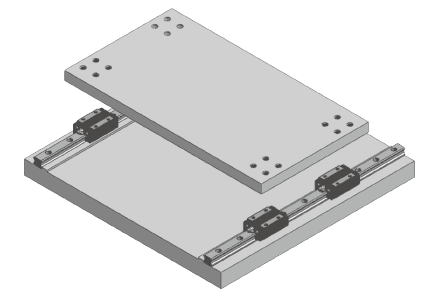
Step5. Mount the subsidiary rail with the same steps foresaid, and then
mount the slides on to the rails
individually. Pay attention to assemble all the accessories, such as grease fitting, oil fitting and seals in this stage
otherwise it will be difficult to assemble the assemblies afterwards due to limited space.
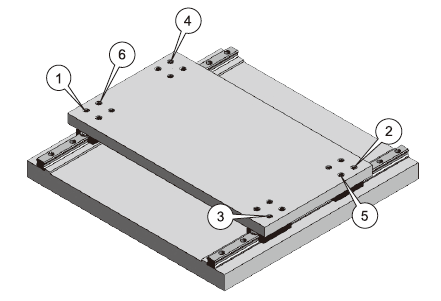
Step6. Place the table gently on the slides on both master and subsidiary
rails.
Step7. Fasten the
crosswise thrust screw to secure the table. Fasten the table screws with the sequence demonstrated in the figure.
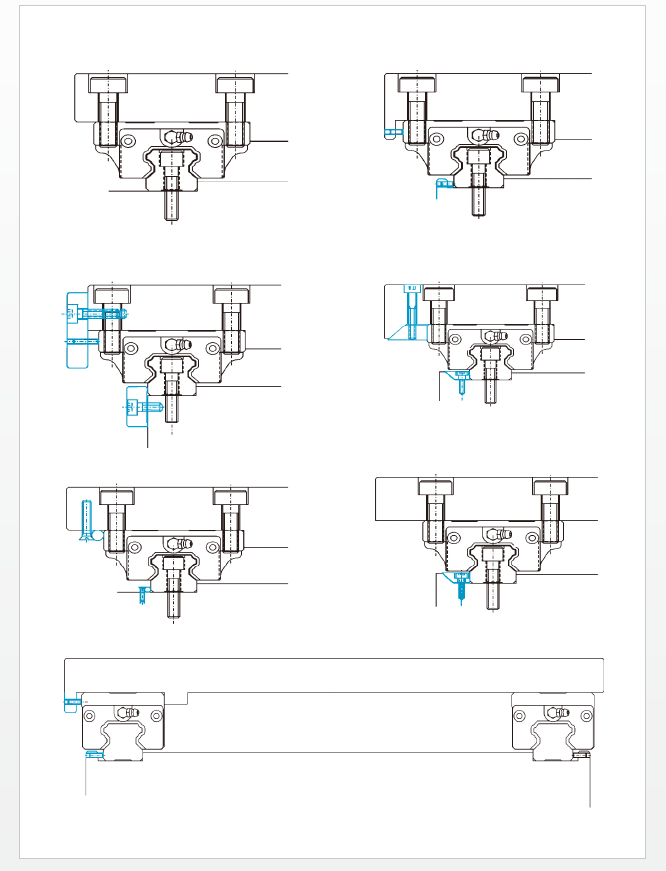
❸Common Mounting Styles
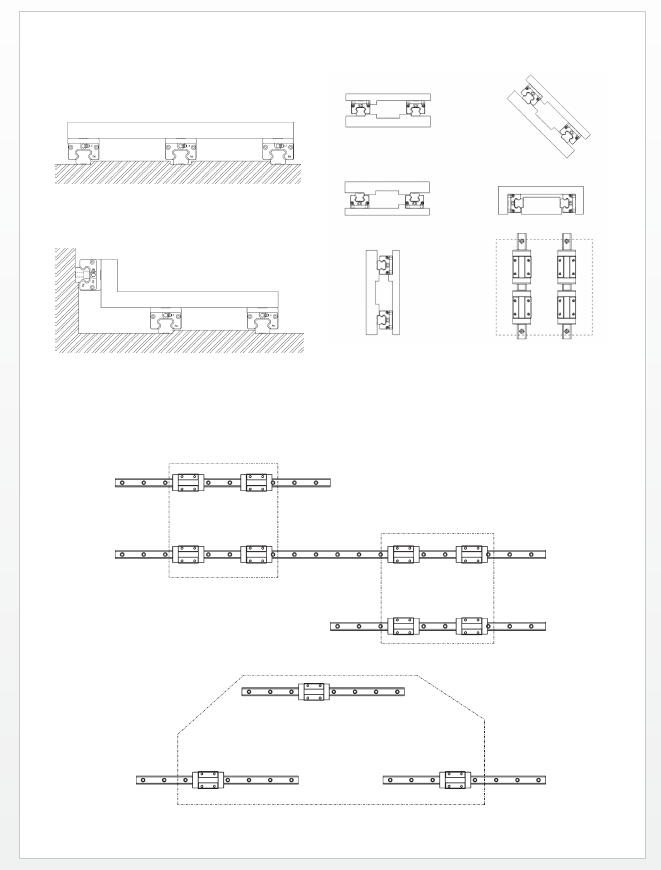
❹ Common Securing Styles
❺Use of Butt- Jointed Rail
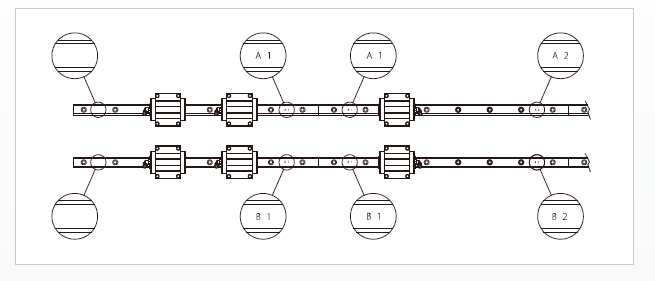
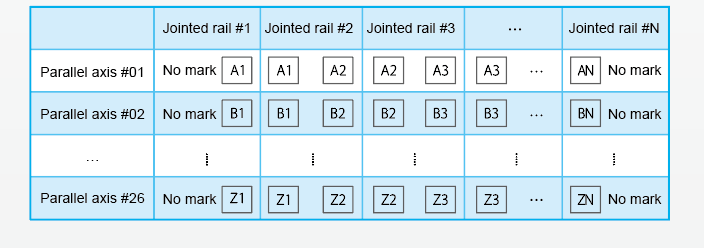
When a long rail is ordered, two or more rails can be butt- jointed to the desired length.
When jointing rails, be sure to match the marked positions correctly as the above figure.
When two or more linear guides with jointed rails are to be arranged parallel to each other,
these linear guides will be numbered as the table below: